AI Assistant
Use the built-in AI assistant to build pages, change elements, fix bugs and answer questions about your project, with your own API keys.
AI Assistant
PhantomStudio has a built-in AI assistant that can read and change your project's files, run checks, look at the preview and answer questions. It has two parts: the AI Chat panel for conversations, and Inline AI for quick edits in the code editor.
You bring your own API keys, so you choose the provider and pay it directly.
Open the AI Chat
- Click AI Chat in the activity bar (⌥4 in Design mode, ⌥5 in Code mode), or press ⌘I (Ctrl+I).
- Or select an element in the preview and click AI in the selection toolbar. Describe the change and it's sent to the chat with that element attached.
The chat docks on the right or at the bottom: use the Bottom / Right button in its header to move it.
Modes: Ask, Plan and Agent
Pick a mode in the chat panel:
| Mode | What the AI does |
|---|---|
| Ask | Answers questions using read-only context. It changes nothing |
| Plan | Inspects the project and writes a concrete plan, but can't implement it. Switch to Agent mode to have the plan carried out |
| Agent | Makes the changes: creates and edits files, installs packages, runs checks, and asks for your approval where needed |
Models and API keys
Click the gear (AI Settings) in the chat header and open Providers. Add an API key for any of the built-in providers (Anthropic, OpenAI, Google or OpenRouter), or add a custom provider with its own base URL. Then pick a model in the chat.
Keys are stored in your browser and sent to the provider you choose.
What the AI can do
| Area | Examples |
|---|---|
| Read the project | Read files, list and find files, search the project, get a file's outline |
| Change files | Create, modify, replace, rename and delete files |
| Check and build | Run astro check, run a build, read the dev server's logs, restart services |
| The preview | Navigate the preview and take screenshots |
| Packages | Install npm packages |
| Git | Show status and diffs, create and switch branches, commit and push |
| WordPress | Read your site's content types and sample content, register post types, taxonomies and field groups, create posts |
| Shell commands | Run commands in your workspace (see Approving commands) |
Reading tools run straight away. Tools that change something, such as file edits, package installs, builds, git commits and pushes, and WordPress changes, wait for you to approve them, unless Auto is on.
Auto
Auto in the chat header (Agent mode only) approves the AI's actions for you, so it can work without stopping. It never approves shell commands: those always wait for you.
Approving commands
In Agent mode the AI can run shell commands in your workspace:
- Read-only commands (such as
cat,ls,grep,findornpx astro check) run straight away. - Any other command shows the whole command and the reason the AI gives for it. Nothing runs until you click Approve. Click Reject to refuse it.
- Auto never approves commands, even when it's on.
- Commands that touch
.git,.npmrcor PhantomStudio's own infrastructure files are always refused. - In Plan and Ask modes, anything that isn't read-only is refused.
Read every command before you approve it. Content the AI reads, such as a web page or a CMS post, could contain instructions meant to trick it.
Approving commands needs infrastructure 1.55 or later, or container 1.22.0 or later for local Docker projects. On older workspaces, an approved command fails with a message asking you to update. Apply infrastructure updates from the update banner, or Help ▾ › Developer › Infrastructure in Code mode. For local Docker, use Update container in the project's ⋯ menu on the dashboard.
Replay what the AI changed
After the AI answers, a bar over the preview offers Replay. It steps through each change, flashing it in the Builder and on the page with a caption, so you can see what was done.
Chats
Conversations are saved. From the chat header you can start a New chat, switch to an earlier one, Clear chat, or delete a chat from the list.
Custom instructions
Create a docs/ai-instructions.md file to tell the AI about your project and your preferences. The AI reads it when it works on your project.
# AI Instructions

## Preferences
- Use TypeScript for all new files
- Follow the existing component patterns
- Use Tailwind CSS for styling

## Project Context
- This is a marketing site for a SaaS product
- The main colors are blue-600 and gray-900
Inline AI (Code mode)
Inline AI edits code right in the code editor, in a small widget at your cursor. It has its own model picker, remembered separately from the chat.
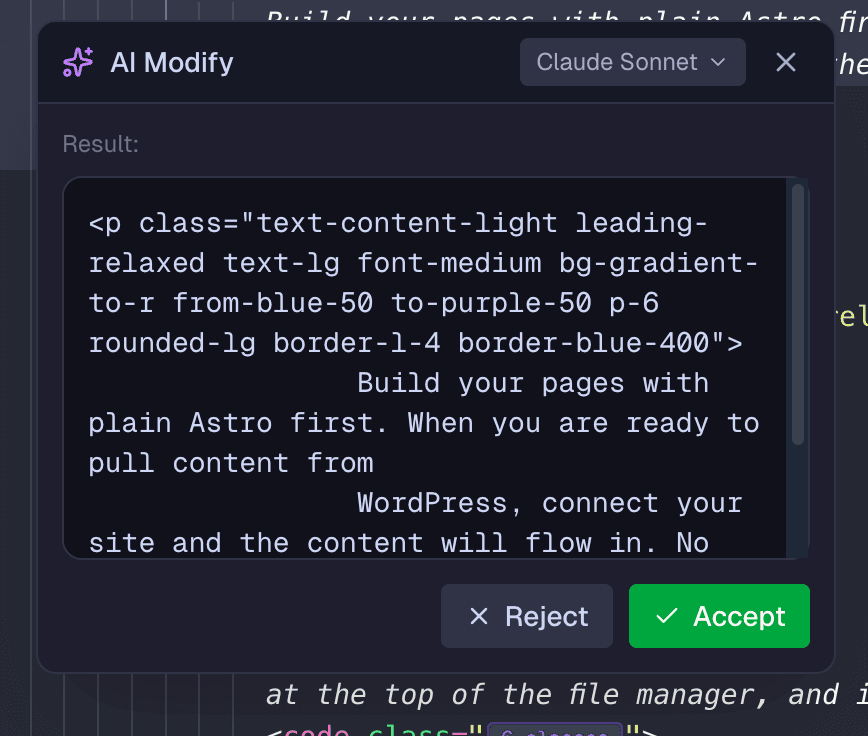
AI Modify
- Select code in the editor.
- Press ⌘⇧M (Ctrl+Shift+M), or right-click and choose AI Modify.
- Describe the change and press ⌘Enter (Ctrl+Enter).
- Review the result, then click Accept or Reject.
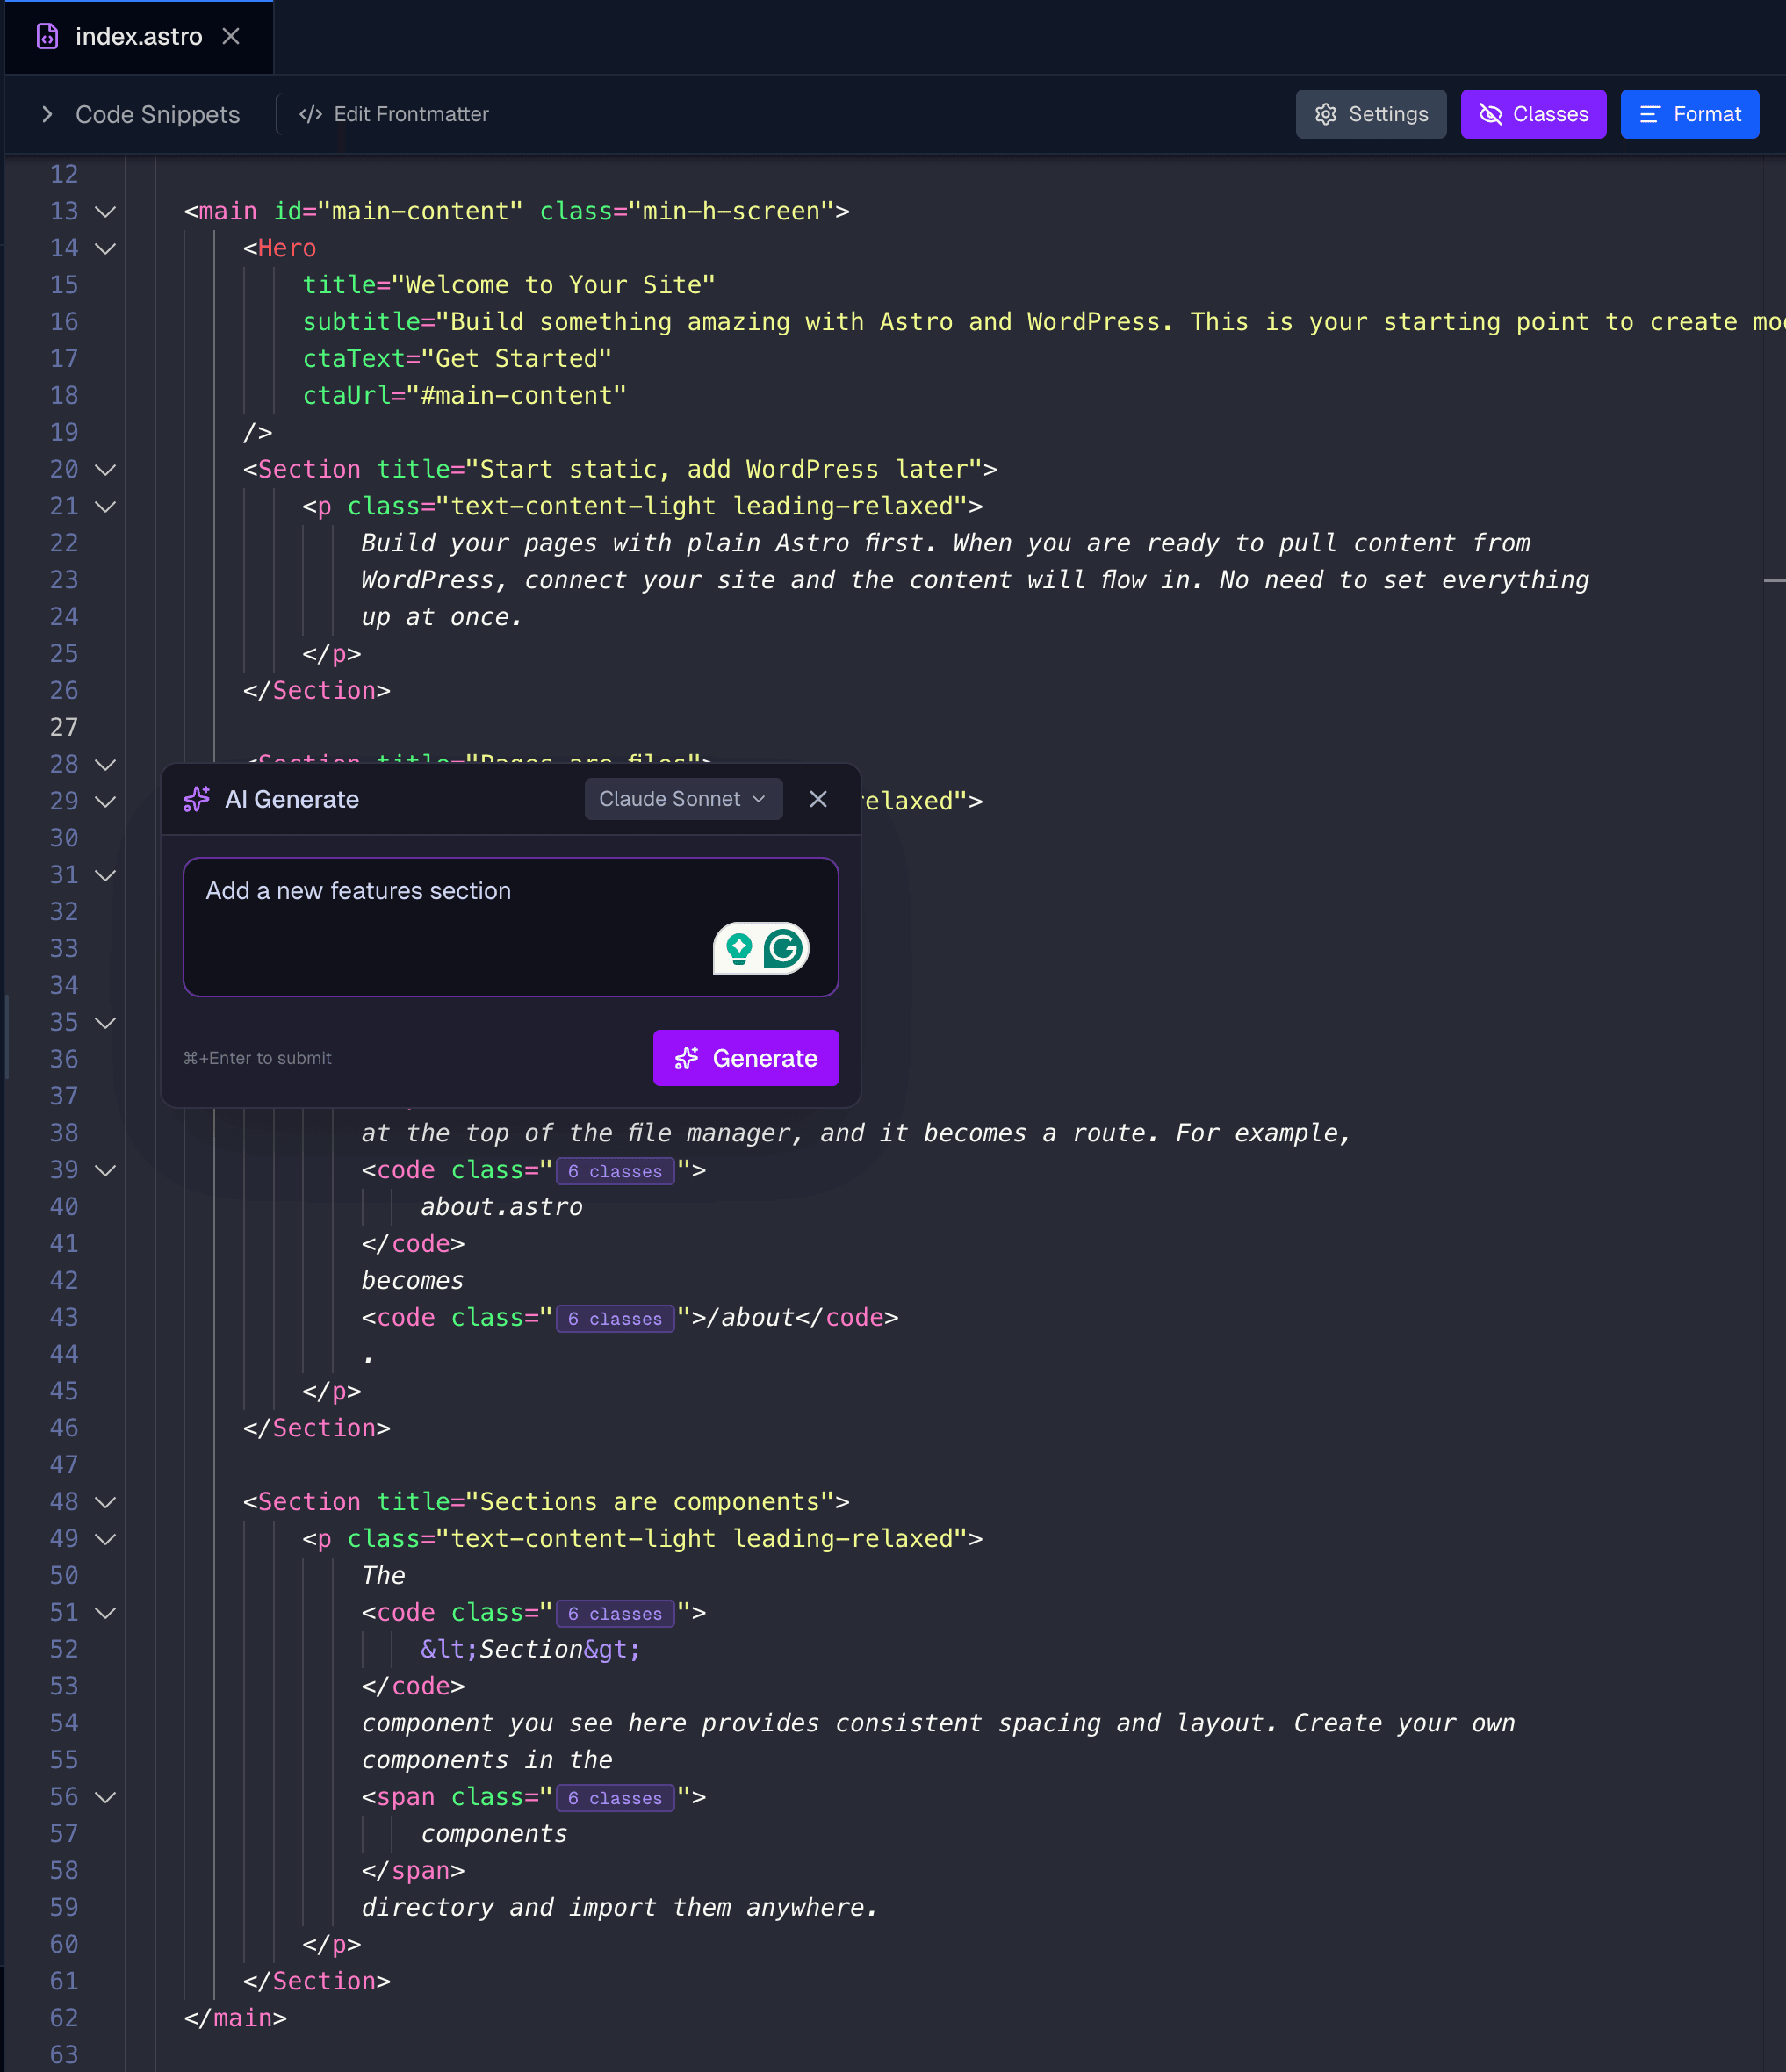
AI Generate
- Put the cursor where the code should go.
- Press ⌘⇧G (Ctrl+Shift+G), or right-click and choose AI Generate.
- Describe what to generate and press ⌘Enter (Ctrl+Enter).
- Click Accept or Reject.
Tips for better results
- Be specific. Instead of "Make a component", try "Create a Card component with an image at the top, a title, a description and a Learn more link, with rounded corners and a shadow."
- Start from the element. Select it in the preview and use AI in the selection toolbar, so the AI knows exactly what you mean.
- Share the error. When something breaks, paste the full error message.
- Plan big changes first. Use Plan mode to agree on the approach, then switch to Agent mode to carry it out.
Troubleshooting
The AI doesn't respond
- Check your API key in AI Settings.
- Check you have credit or quota with the provider.
- Try another model.
A tool call failed
Open the tool card in the chat to see the error. The AI often retries with another approach.
Inline AI shows "No API keys configured"
Add at least one key in AI Settings (the gear in the chat header). Inline AI picks it up.
Next steps
- AI Agents (MCP): connect Claude Code, Codex or Cursor to your projects
- Claude Code CLI: run Claude Code in the terminal next to the Builder
- Design Mode and the Builder: combine AI with visual editing